This guide contains all the steps required to properly submit an iOS app to the App Store.
Prerequisites:
Ensure that all app information and metadata is complete and accurate
Contact information in case App Review needs to reach us
An active demo account and login information, plus any other hardware or resources that might be needed to review your app (e.g. a sample QR code)
The following programs installed:
- Xcode
- Keychain Access
- Application Loader (opt)
Steps required for submitting an app:
- Assemble App Store Information
- Create a Bundle Identifier
- Create a Certificate Signing Request
- Create an App Store Production Certificate
- Create a Production Provisioning Profile
- Create an App Store Listing
- Create a Release Build
- Fill in the Version Information
- Submit Version for Review
- Release (Only for Manual release)
A. Assemble App Information:
It is very important to collect all of the information we need to submit before start the process.
Screenshots:
|
You need at least one for every supported device screen size. The screenshots cannot contain transparency
|
Name:
|
Name of the app as seen by users
|
Description:
|
A description of your app, detailing features and functionality
|
Keywords:
|
Separate keywords with a comma
|
Support URL:
|
A URL with support information for your app
|
Marketing URL:
|
A URL with marketing information about your app, optional
|
Privacy Policy: URL:
|
A URL containing your app’s privacy policy, optional
|
App Icon:
|
This icon will be used on the App Store and must be in the JPG or PNG format, with a minimum resolution of at least 72 DPI, and in the RGB color space. It must not contain layers or rounded corners.
|
Categories:
|
Secondary category is optional
|
Rating:
|
Generate our rating based on the questionnaire
|
Copyright:
|
Use the format: YYYY Company Name
|
Demo Account:
|
“The username and password for a full-access account for our app. Include details for additional accounts in the Notes field.”
|
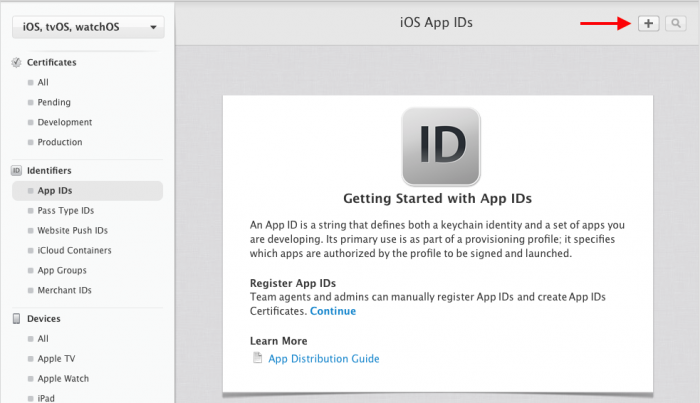
B. Create a Bundle Identifier
The bundle identifier is the name of the app, as seen by both the App Store and iOS devices.
- In the browser, navigate to Apple’s Developer Portal
- Log in
- On the side menu, click Identifiers\App IDs:
- Click the “+” in the top right of the screen
- Name the App ID the same as our app
- Make sure the Bundle ID follows the standard naming convention: com.companyName.appName
- Check any App Services the app needs, click Continue
- Verify the services are correct, then click Submit.

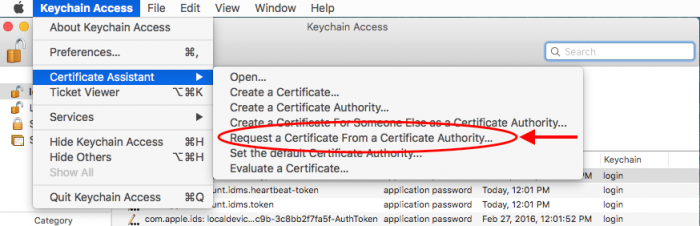
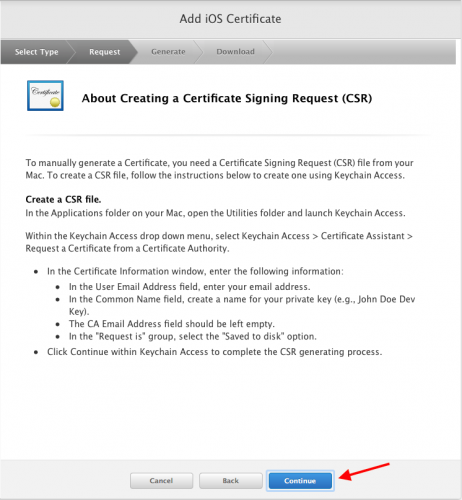
C. Create a Certificate Signing Request
Certificate Signing Requests are used to link your computer to your Apple developer account.
- Open a program called KeyChain Access
- In the top left menu, click Certificate Assistant
- Click Request a Certificate From a Certificate Authority…
- User email: Enter your email address
- Common Name: We recommend using the name of the app
- CA email is not actually required
- Check Saved to Disk, click Continue
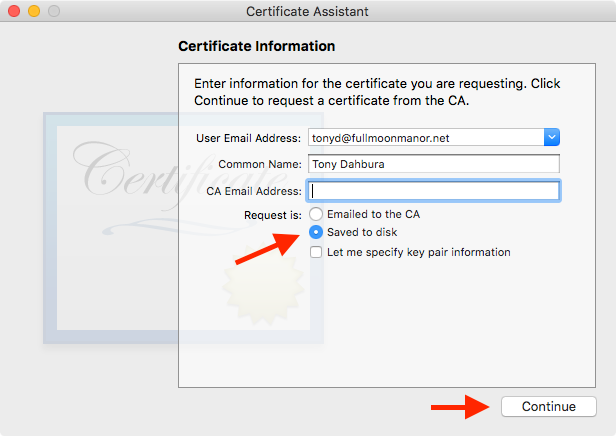
- Save the Certificate Signing Request for later on your finder.
D. Create an App Store Production Certificate
Code Signing Certificates are used to link iOS apps to your Apple developer account.
- In your browser, navigate to Apple’s Developer Portal
- Click Certificates
- Click the “+” in the top right of the screen
- Click the App Store Production
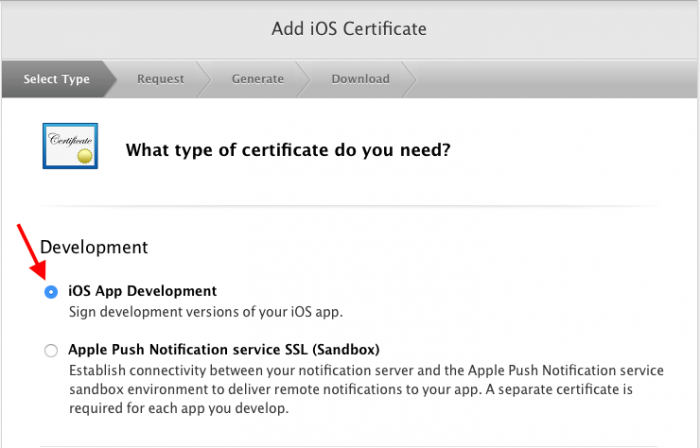
- Currently named “App Store and Ad Hoc” under Production
- Click Continue
- Upload the Certificate Signing Request created earlier
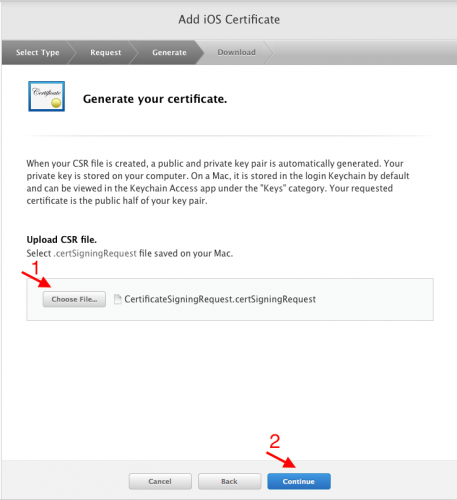
- Download the Certificate
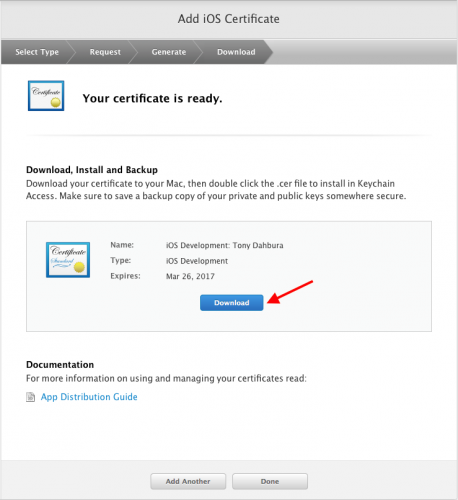
- Install the certificate on your computer by double clicking
- Keep this file somewhere safe
E. Create a Production Provisioning Profile
Provisioning Profiles are packaged with iOS apps so users devices can install them.
- In your browser, navigate to Apple’s Developer Portal
- Log in
- Click Provisioning Profiles
- Click the “+” in the top right of the screen
- Click the App Store Distribution option, click Continue
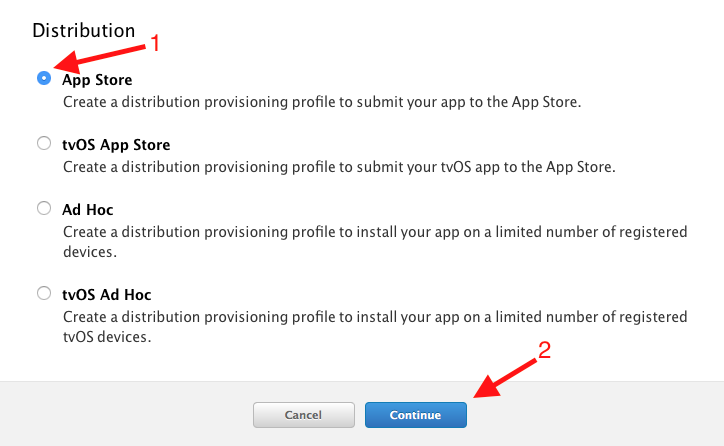
- Select the Bundle ID created earlier, click Continue

- Select the Certificate created earlier, click Continue
- Make sure the Profile Name follows the standard naming convention: App Name App Store Distribution
- Click Generate
- Download it
- Install the provision profile on your computer by double clicking
- Keep this file somewhere safe
F. Create App Store Listing in iTunes Connect
Reserve a slot in the App Store for your app for users to see.
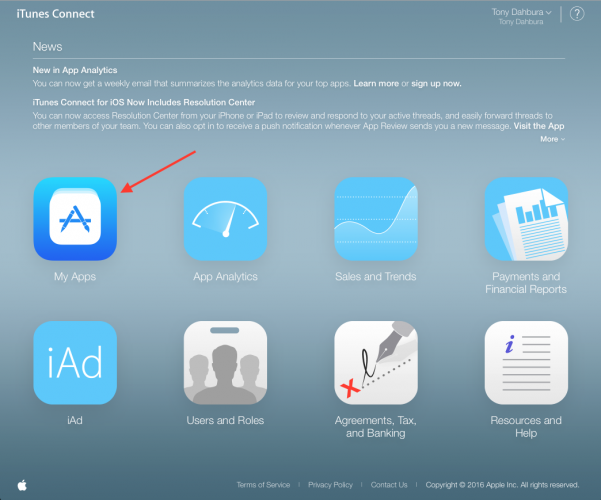
- Start in your browser, navigate to iTunes Connect
- Log in
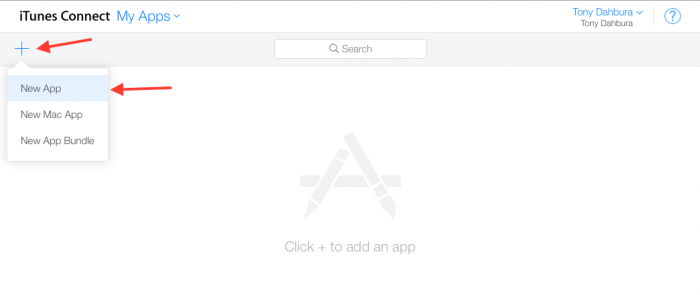
- Click My Apps
- Click the “+” in the top left of the screen
- Click “New iOS App”
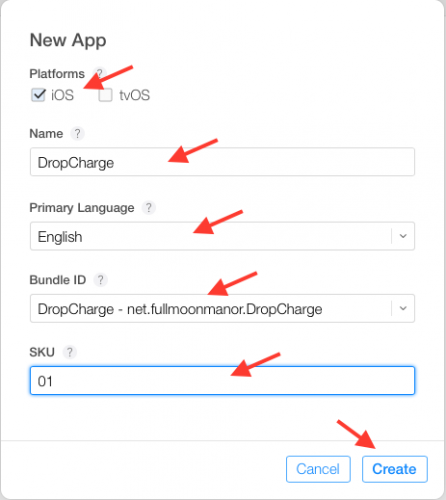
- Bundle ID: choose the one created on Developer Portal
- For convenience, make the SKU match the Bundle ID created earlier
- Click Create to create the first version listing
G. Make the release build
Package the actual binary that users will be uploading to the store.
- Start Xcode
- Open the project or workspace
- Update the version and build numbers
- Open Build Settings
- Make sure All settings is selected
- Scroll to Code Signing
- Use the provisioning profile created earlier
- Use the code signing identity created earlier
- In the top menu, select Generic iOS Device as the build destination if no actual device is connected
- Menu, Project, Archive
- Click Distribute
- Sign in as your apple developer account
- Choose Build
- Submit to app store
- Wait for the confirmation
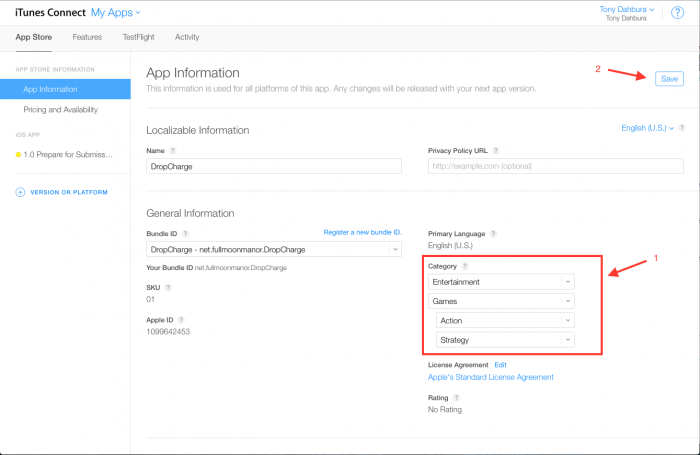
H. Fill In Version Information
Users will decide whether or not to install your app based on your store listing.
- Enter all of the information assembled in step 1
- Select the build you wish to tie to the version (Note: This usually appears 10-15 minutes after sending from Xcode)
- Fill in pricing information
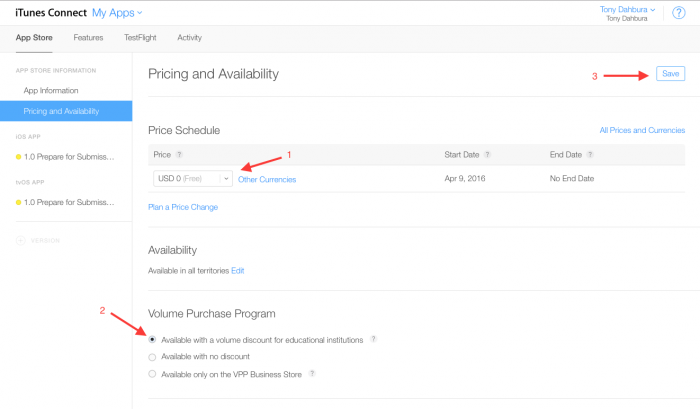
4. Add screenshots for user reference and preview in the Prepare for submission tab Just below the Pricing and Availability.

Scroll down and complete the the description (this is what the users will see in the app store) and keywords.
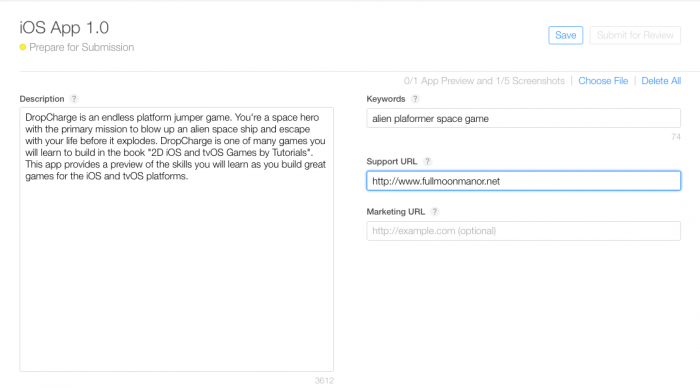
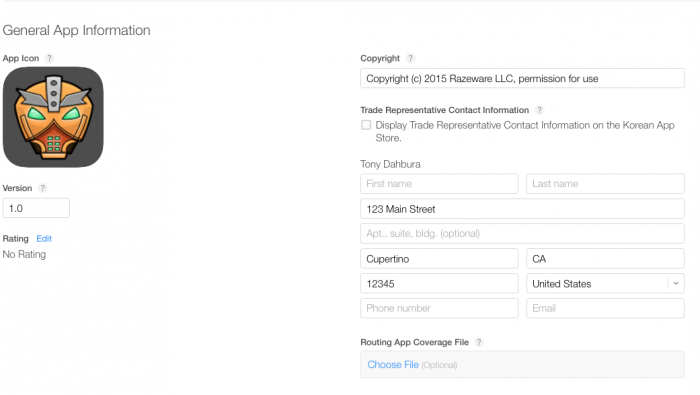
Set the version number (should be the same as in your app’s Xcode project).
Fill out a copyright notice (generally just the release year and your name or your company’s name), a contact email and affiliated websites.
Scroll down to App Review Information. This section is designed to help the person who reviews and approves your app. The Notes can be used for details about your app that you want the reviewer to know about. For example, if users need to sign up at a website or even within the app in order to use it, provide some credentials here to make the reviewer’s job easier. Also, if your app requires special hardware, ensure that you explain that here too, and try to have a way for the reviewer to use the app without the hardware. Complete the contact information so that the reviewer can reach you to discuss things if they need to

Select the release type
Manual release – after the app is accepted, a Release button will appear
Automatic release – as soon as the app is accepted, it will be released
Finally, use the Version Release section to indicate when you want the app to be released. Since this is the first version, just leave the Automatically release this version option selected.
Now click Save
I. Submit Version for Review
Every app that is submitted to the store has to be reviewed by the Apple team before release.
When you’re ready to submit the app for App Review, iTunes Connect walks you through a final set of questions. Only users with the Admin, Technical, or App Manager role can submit apps for review.
After you provide app configuration information, as described in Creating an iTunes Connect Record for an App, and uploaded a build, as described in Uploading a Build for an App, you’re ready to choose a a build, validate your app information, and submit your app for review. Note that only users with the Admin, Technical, or App Manager role can submit apps for review.
If you’re submitting a new version of an existing app, see Replacing Your App with a New Version instead of reading this chapter.
Before you submit your app, you also have the option of having users test prerelease versions of your app. This step is described in TestFlight Beta Testing (Optional).
Choosing a Build
You can upload any number of builds for your app, and they will remain in Activity on the App Details page. (See Viewing Builds.) When you submit the app for App Review, only one build can be associated with the App Store version of the app you want to submit. The build, called the current build, is the one that will be submitted for App Review.
To choose a build to be the current build, follow these steps:
- Open the App Details page for the app, as described in Creating an iTunes Connect Record for an App.
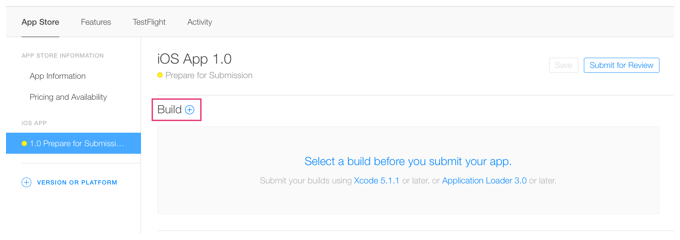
- Under App Store, select the version for the platform you want to submit and scroll to the Build section.
- Click the plus sign to select a build. The plus sign appears only if you have uploaded builds and have not yet not selected a current build. If you have already selected a build, you can remove it if you want to select a new one. See Removing the Current Build.
- A list pops up containing all of the uploaded builds. Select the one you want to choose as the current build.
- If an earlier version of your app became Ready for Sale in the App Store, then the list of builds includes only builds you have uploaded since then. For more detail on which builds are available for you to choose, see Viewing Builds.
- After you click Done, the build number appears in the Build section of Versions along with its upload date and time.
- Click Submit at the top of the page.

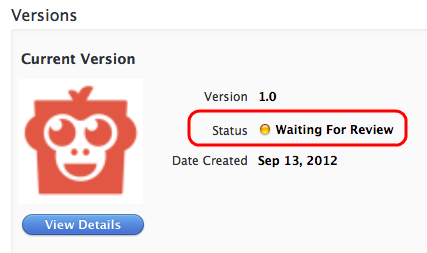
Waiting for Review:
After submitted the app status is changed to “waiting for review”
- Wait for approval
- This process usually takes 2-3 weeks for a new submission
- If your app was not approved, review the notes in the Resolution Center and make any necessary changes to the app or version information then resubmit
J. Release (Only for Manual release)
The final step.
- If you selected Manual release, click Release your app when ready
- Wait for the green “Ready for Sale” version status (This might take from 1 hour to 1 day after release)
- Search for your app on the App Store
- Celebrate!
When submitting a new version of your app, you will only have to repeat steps G through J.
Just FYI…
App Store Review Guidelines
Useful and interesting guide for sure this help me a lot to keep my iPhone and Laptop working very well.
ReplyDeleteiOS Development
I got here much interesting stuff. The post is great! Thanks for sharing it! Apple Developer Login
ReplyDelete